Native ads
Native ads are an ad format where the appearance of ads can be determined on the app side. Use this feature to adjust the visual style and placement of ads so that they match the design of your app.
Note
Examples showing how all the format types work are available in the demo project.
|
Entity |
Description |
|
|
If |
|
|
Use:
|
Example of creating a native ad
Main steps for integrating native ads:
- Create and configure the ad loader
NativeAdLoader. - Register the loader’s ad event listener.
- Load the ad.
- Display the loaded ad.
Native ad integration specifics
-
All calls to Yandex Mobile Ads SDK methods must be made from the main thread.
-
If you receive an error in the
onAdFailedToLoad()callback, do not try to load a new ad again immediately. If you still need to retry, limit how many times you reload. That helps avoid endless failed requests and connectivity issues when the network is limited. -
Keep a strong reference to the ad and its loader for the entire lifetime of the screen where the user interacts with the ad.
-
Calculate the ad container size based on the ad content. After loading finishes, you must display all components of the ad. You can get the list of components available in the ad from the
NativeAdobject. -
Ads with video usually perform better. To show video ads, the ad container and the
MediaViewcomponent must both be at least 300×160 dp (density-independent pixels). -
Use a layout that includes the full set of possible components. In practice, layouts that include the full set of components tend to perform better.
Loading ads
To load native ads, create a NativeAdLoader object.
Ad request parameters are configured with AdRequest.Builder. You can pass the block ID, image loading mode, and other data that can improve ad selection.
To receive load results, create a NativeAdLoadListener and pass it to loadAd().
Call loadAd() to load the ad.
The example below shows how to load a native ad from an Activity:
class CustomNativeAdActivity : AppCompatActivity(R.layout.activity_custom_native_ad) {

  private val nativeAdView get() = binding.nativeAd.root

  private var nativeAdLoader: NativeAdLoader? = null

  private lateinit var binding: ActivityCustomNativeAdBinding

  override fun onCreate(savedInstanceState: Bundle?) {
      super.onCreate(savedInstanceState)
      binding = ActivityCustomNativeAdBinding.inflate(layoutInflater)
      setContentView(binding.root)

      nativeAdLoader = NativeAdLoader(this)
      nativeAdLoader?.loadAd(
          // Methods in the AdRequest.Builder class can be used here to specify individual options settings.
          AdRequest.Builder("your-ad-unit-id").build(),
          object : NativeAdLoadListener {
              override fun onAdLoaded(p0: NativeAd) {
                  // The ad was loaded successfully. Now you can show loaded ad.
              }

              override fun onAdFailedToLoad(p0: AdRequestError) {
                  // Ad failed to load with AdRequestError.
                  // Attempting to load a new ad from the onAdFailedToLoad() method is strongly discouraged.
              }
          })
  }
}
class CustomNativeAdActivity extends AppCompatActivity {
  private NativeAdView mNativeAdView = mBinding.nativeAd.getRoot();

  @Nullable private NativeAdLoader mNativeAdLoader = null;

  private ActivityCustomNativeAdBinding mBinding;

  @Override
  public void onCreate(@Nullable Bundle savedInstanceState) {
      super.onCreate(savedInstanceState);
      mBinding = ActivityCustomNativeAdBinding.inflate(getLayoutInflater());
      setContentView(mBinding.getRoot());

      mNativeAdLoader = new NativeAdLoader(this);
      // Methods in the AdRequest.Builder class can be used here to specify individual options settings.
      mNativeAdLoader.loadAd(
              new AdRequest.Builder("your-ad-unit-id").build(),
              new NativeAdLoadListener() {
                  @Override
                  public void onAdLoaded(@NonNull final NativeAd nativeAd) {
                      // The ad was loaded successfully. Now you can show loaded ad.
                  }

                  @Override
                  public void onAdFailedToLoad(@NonNull final AdRequestError error) {
                      // Ad failed to load with AdRequestError.
                      // Attempting to load a new ad from the onAdFailedToLoad() method is strongly discouraged.
                  }
              }
      );
  }
}
Displaying ads
After loading finishes, you must display all components of the ad. You can get the list of components available in the ad from the NativeAd object.
Tip
Use a layout that includes the full set of possible components. In practice, a layout that includes the full set of components tends to perform better.
For each ad component, provide a View through NativeAdViewBinder.Builder. The class takes a NativeAdView container as an argument. All ad components must be defined as subviews of that container.
Bind the resulting ad layout to the NativeAd object.
Code example
private fun showAd(nativeAd: NativeAd) {
    val nativeAdViewBinder = binding.nativeAd.run {
        NativeAdViewBinder.Builder(nativeAdView)
            .setAgeView(age)
            .setBodyView(body)
            .setCallToActionView(callToAction)
            .setDomainView(domain)
            .setFaviconView(favicon)
            .setFeedbackView(feedback)
            .setIconView(icon)
            .setMediaView(media)
            .setPriceView(price)
            .setRatingView(rating)
            .setReviewCountView(reviewCount)
            .setSponsoredView(sponsored)
            .setTitleView(title)
            .setWarningView(warning)
            .build()
    }

    when (val result = nativeAd.bindNativeAd(nativeAdViewBinder)) {
        is AdBindingResult.Failure -> {
            Logger.error(result.exception.message.orEmpty())
        }
        AdBindingResult.Success -> {
            nativeAd.setNativeAdEventListener(NativeAdEventLogger())
        }
    }
}

private inner class NativeAdEventLogger : NativeAdEventListener {

    override fun onAdClicked() {
        // Called when a click is recorded for an ad.
    }

    override fun onImpression(data: ImpressionData?) {
        // Called when an impression is recorded for an ad.
    }
}
private void showAd(@NonNull final NativeAd nativeAd) {
    final NativeAdViewBinder nativeAdViewBinder = new NativeAdViewBinder.Builder(mNativeAdView)
            .setAgeView(age)
            .setBodyView(body)
            .setCallToActionView(callToAction)
            .setDomainView(domain)
            .setFaviconView(favicon)
            .setFeedbackView(feedback)
            .setIconView(icon)
            .setMediaView(media)
            .setPriceView(price)
            .setRatingView(rating)
            .setReviewCountView(reviewCount)
            .setSponsoredView(sponsored)
            .setTitleView(title)
            .setWarningView(warning)
            .build();
    AdBindingResult result = nativeAd.bindNativeAd(nativeAdViewBinder);
    if (result instanceof AdBindingResult.Failure) {
        Log.e("TAG", ((AdBindingResult.Failure) result).getException().getMessage());
    } else {
        nativeAd.setNativeAdEventListener(new CustomNativeAdActivity.NativeAdEventLogger());
    }
}

private class NativeAdEventLogger implements NativeAdEventListener {
    @Override
    public void onAdClicked() {
        // Called when a click is recorded for an ad.
    }

    @Override
    public void onImpression(@Nullable ImpressionData data) {
        // Called when an impression is recorded for an ad.
    }
}
Testing native ad integration
Using demo ad units
To verify native ad integration and to test your app, we recommend using test ads.
To guarantee test ads on every ad request, we provide special demo ad unit IDs. Use them to verify that integration works.
Demo adUnitId for text-and-image ads: demo-native-content-yandex.
Demo adUnitId for mobile app install ads: demo-native-app-yandex.
Warning
Before publishing your app to the store, replace the demo ad unit ID with a real one from the Yandex Advertising Network interface.
Verifying integration
You can verify native ad integration using the analyzer built into the SDK.
The tool checks native ad wiring and prints a detailed report to the log.
To view the report, filter by the keyword YandexAds in Android Logcat.
adb logcat -v brief '*:S YandexAds'
If integration is successful, you will see a message like:
adb logcat -v brief '*:S YandexAds'
mobileads$ adb logcat -v brief '*:S YandexAds'
I/YandexAds(13719): [Integration] Ad type native was integrated successfully
If problems are found, the log contains a detailed report and remediation hints.
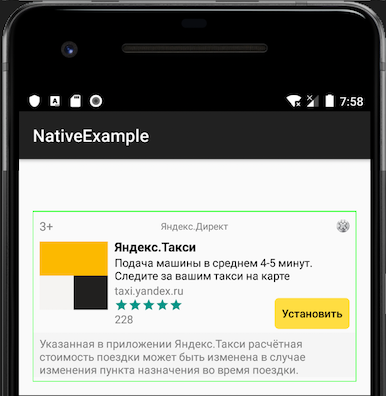
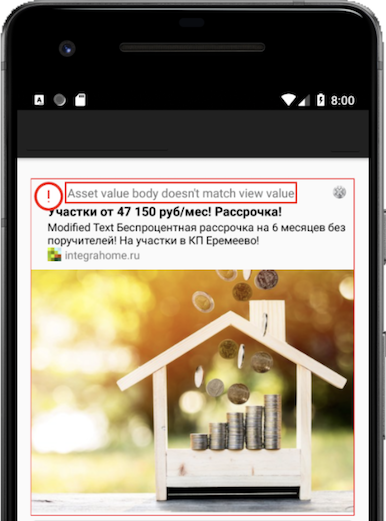
Native integration indicator
The indicator shows whether native integration succeeded or provides debug information to understand errors.
To show the indicator in debug mode, call enableDebugErrorIndicator with true:
YandexAds.enableDebugErrorIndicator(true)
If integration succeeds, in debug mode a light green frame appears over the ad.
If native integration has an error, in debug mode an indicator appears over the ad. Tap the indicator to see debug details; tap again to hide the message.
|
|
|

To hide the indicator in debug mode, call enableDebugErrorIndicator with false:
YandexAds.enableDebugErrorIndicator(false)